Shooting in Low Light
Have you ever wanted to take a great low-light photo but didn’t know how?
Well, I can relate. To take your low-light photography to the next level, I think it’s important to learn how to use manual mode.
This post will provide advice on how to take better photos in low light by using manual mode and other tricks.
How Can I Take Pictures in Low Light?
The phrase “low light” is used to describe conditions in photography and related industries when the amount of available light, whether it’s natural or artificial, is insufficient for proper exposure.
While this process can lead to some intriguing visual effects, it can also be quite challenging technically.
So, you’ll have the opportunity to fine-tune your low-light photography settings for the optimal capture of the picture.
Can You Describe the Many Forms of Dim Light?
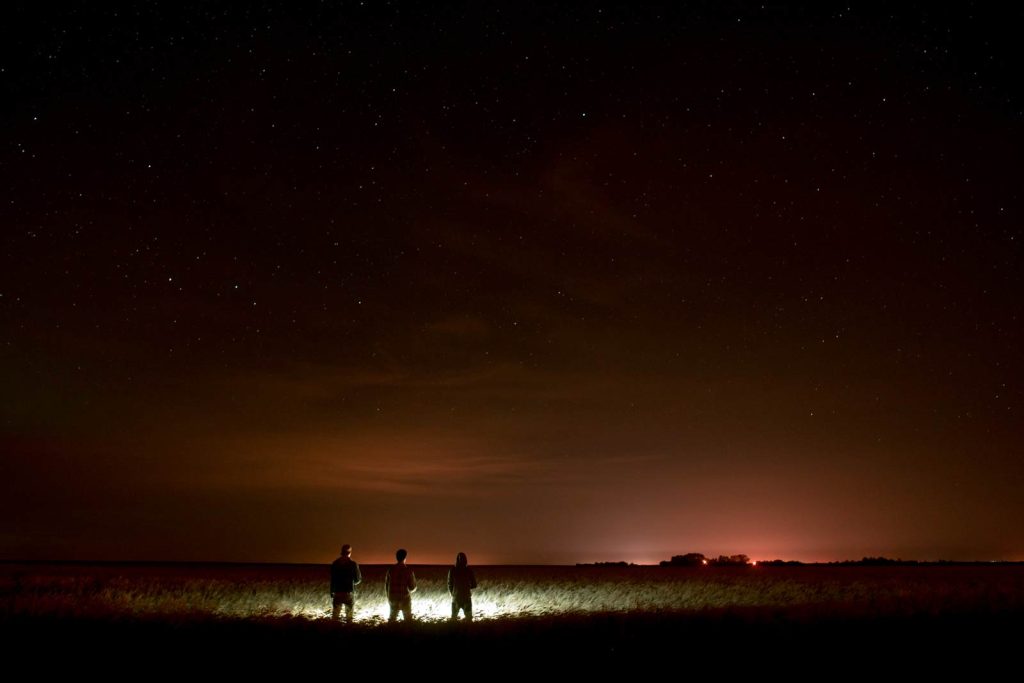
Dusk, dawn, twilight
When the sun dips below the horizon at sunrise and sunset, the light is gentle and diffused.
Civil, nautical, and astronomical twilight are subsets of this time that offer distinct light and color effects.
Time of the Blue/Golden Hour
The specific times of twilight being referred to are the Blue Hour and the Golden Hour. Light is known as the Golden Hour when it is both warmer and softer, immediately after sunrise or just before sunset. The term “blue hour” is usually used to describe the part of twilight when the sun is low enough in the sky to cast purely blue light.
This condition occurs when the sun sets completely below the horizon, leaving only the moon, stars, or man-made lights to illuminate the night.
Those indoor circumstances are characterized by a lack of natural light. A restaurant with low lighting or a room with few windows are two such examples.
Shaded areas
Conditions of low light can exist even on bright days in places where there is plenty of shade, like under a tree or in a narrow alleyway between buildings.
Low-light circumstances can also be caused by weather conditions such as heavy fog, overcast days, or other similar phenomena.
The advantages and disadvantages of various forms of low light are distinct.
For example, while twilight’s gentle light might produce beautiful, multicolored skies, it can be difficult to expose foreground things sufficiently.
To avoid blurry or noisy images when shooting at night, you’ll need to use a long exposure or a high ISO level.
The Auto option on our cameras is something we use frequently as photographers. But I’ve discovered that shooting in manual mode really helps when it comes to low light. It allows you to fine-tune your camera settings to your liking so you can take stunning photos in low light.
A Comprehensive Guide to the Exposure Triangle
We must first understand the Exposure Triangle, a fundamental concept in photography. Three primary components make this set up: ISO, aperture, and shutter speed.
The sensitivity of your camera to light is controlled by the ISO setting. Your camera’s sensitivity and its ability to capture more light can be adjusted by increasing the ISO. Raising the ISO too quickly could result in blurry photos, so use caution.
The aperture, or the size of the lens opening, controls the amount of light that may enter your camera. More light can be let in via a larger aperture (lower f-number), which is helpful in low-light conditions.
The shutter speed refers to how long the light remains on the camera’s sensor. A longer shutter speed allows for more light to get through, which can be artistically utilized to depict blurred motion.
For low-light photography, a tripod may be an absolute godsend. It eliminates the need to worry about camera shake, letting you use slower shutter speeds.
Keep the ISO low when taking pictures. The setting will influence how sensitive the camera’s sensor is to light. In low light, it’s easy to crank up the ISO, but doing so could make your photographs look grainier and noisier than they actually are. A more effective strategy for achieving superior exposure free of grain is to use a low ISO and play around with the aperture and shutter speed.
The aperture is the size of the hole through which light enters a camera. Please ensure you use a wide aperture. In low-light situations, a wider aperture (lower f-stop value) lets more light in. For low-light photography, the best lenses to use are those with wide apertures, sometimes referred to as “fast” lenses.
Ring for digital cameras’ apertures
Decrease the shutter speed: The shutter speed controls the amount of time the camera’s shutter stays open, letting light into the sensor. More light can be let in by decreasing the shutter speed. Keep in mind that slower shutter speeds might cause motion blur if either the subject or the camera moves; to avoid this, use a tripod or other stabilization method.
Always shoot in RAW format. Compared to JPEGs, RAW files have more depth and information, giving you more options when it comes to post-processing. If you’re shooting in low light, RAW is your best bet for adjusting exposure, white balance, and noise reduction without sacrificing quality.
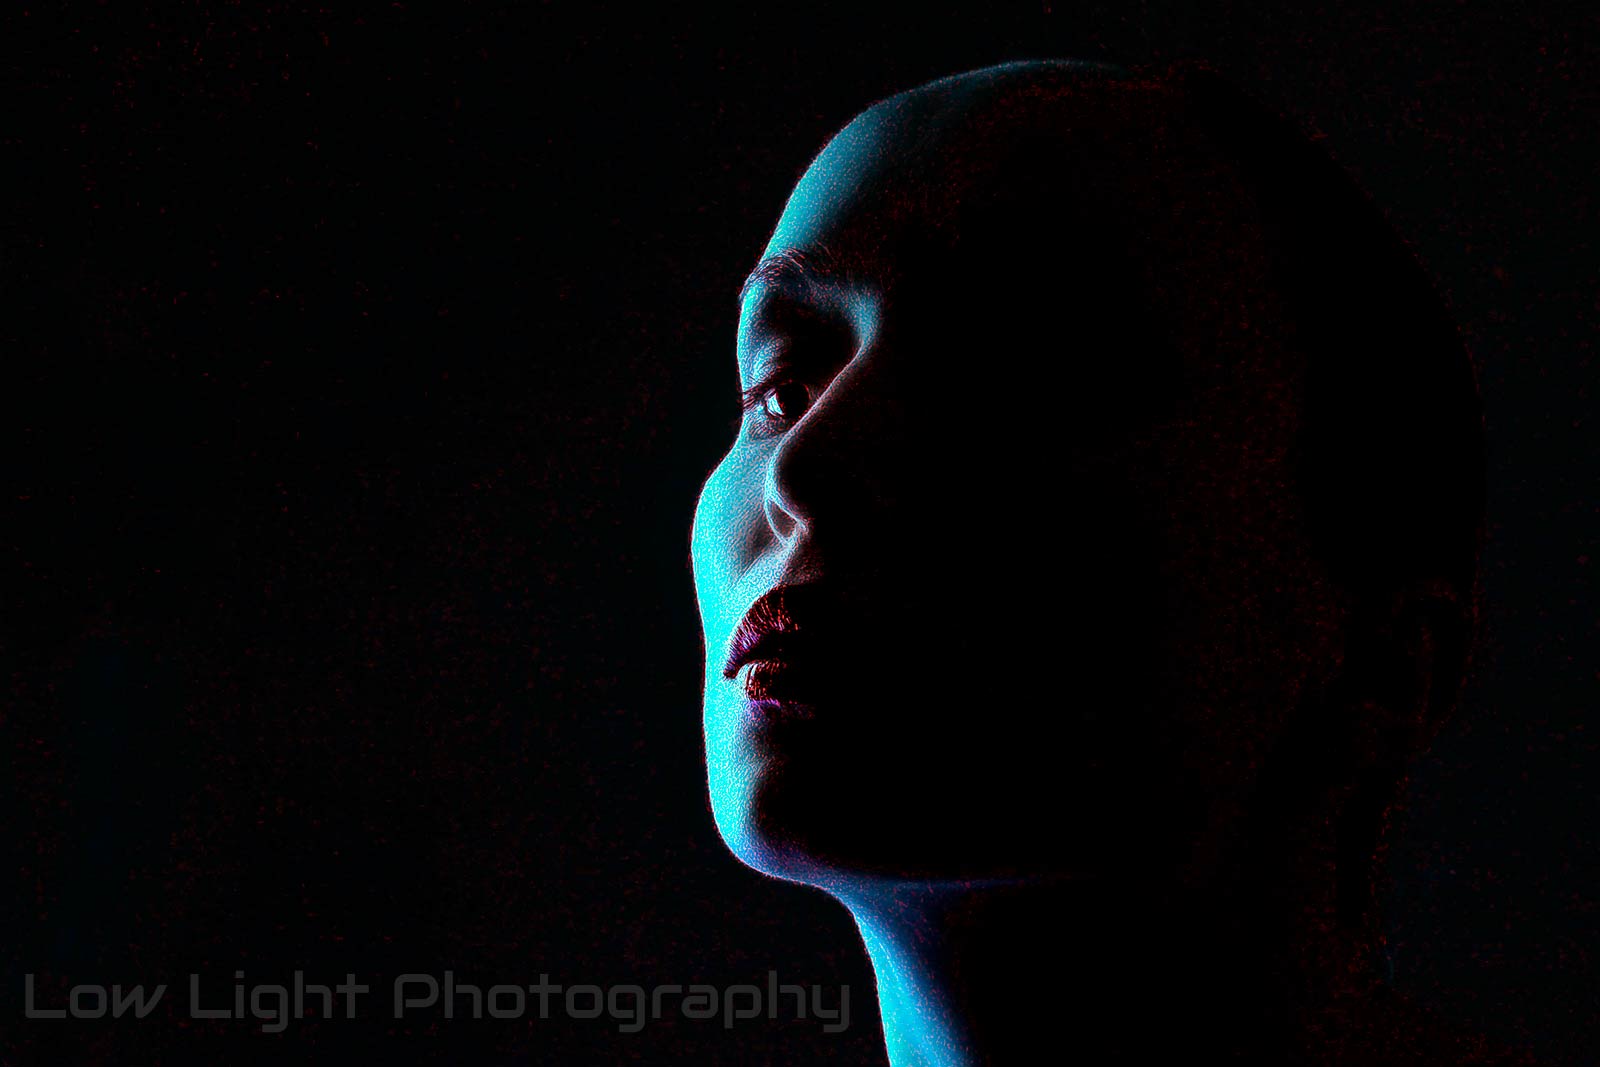
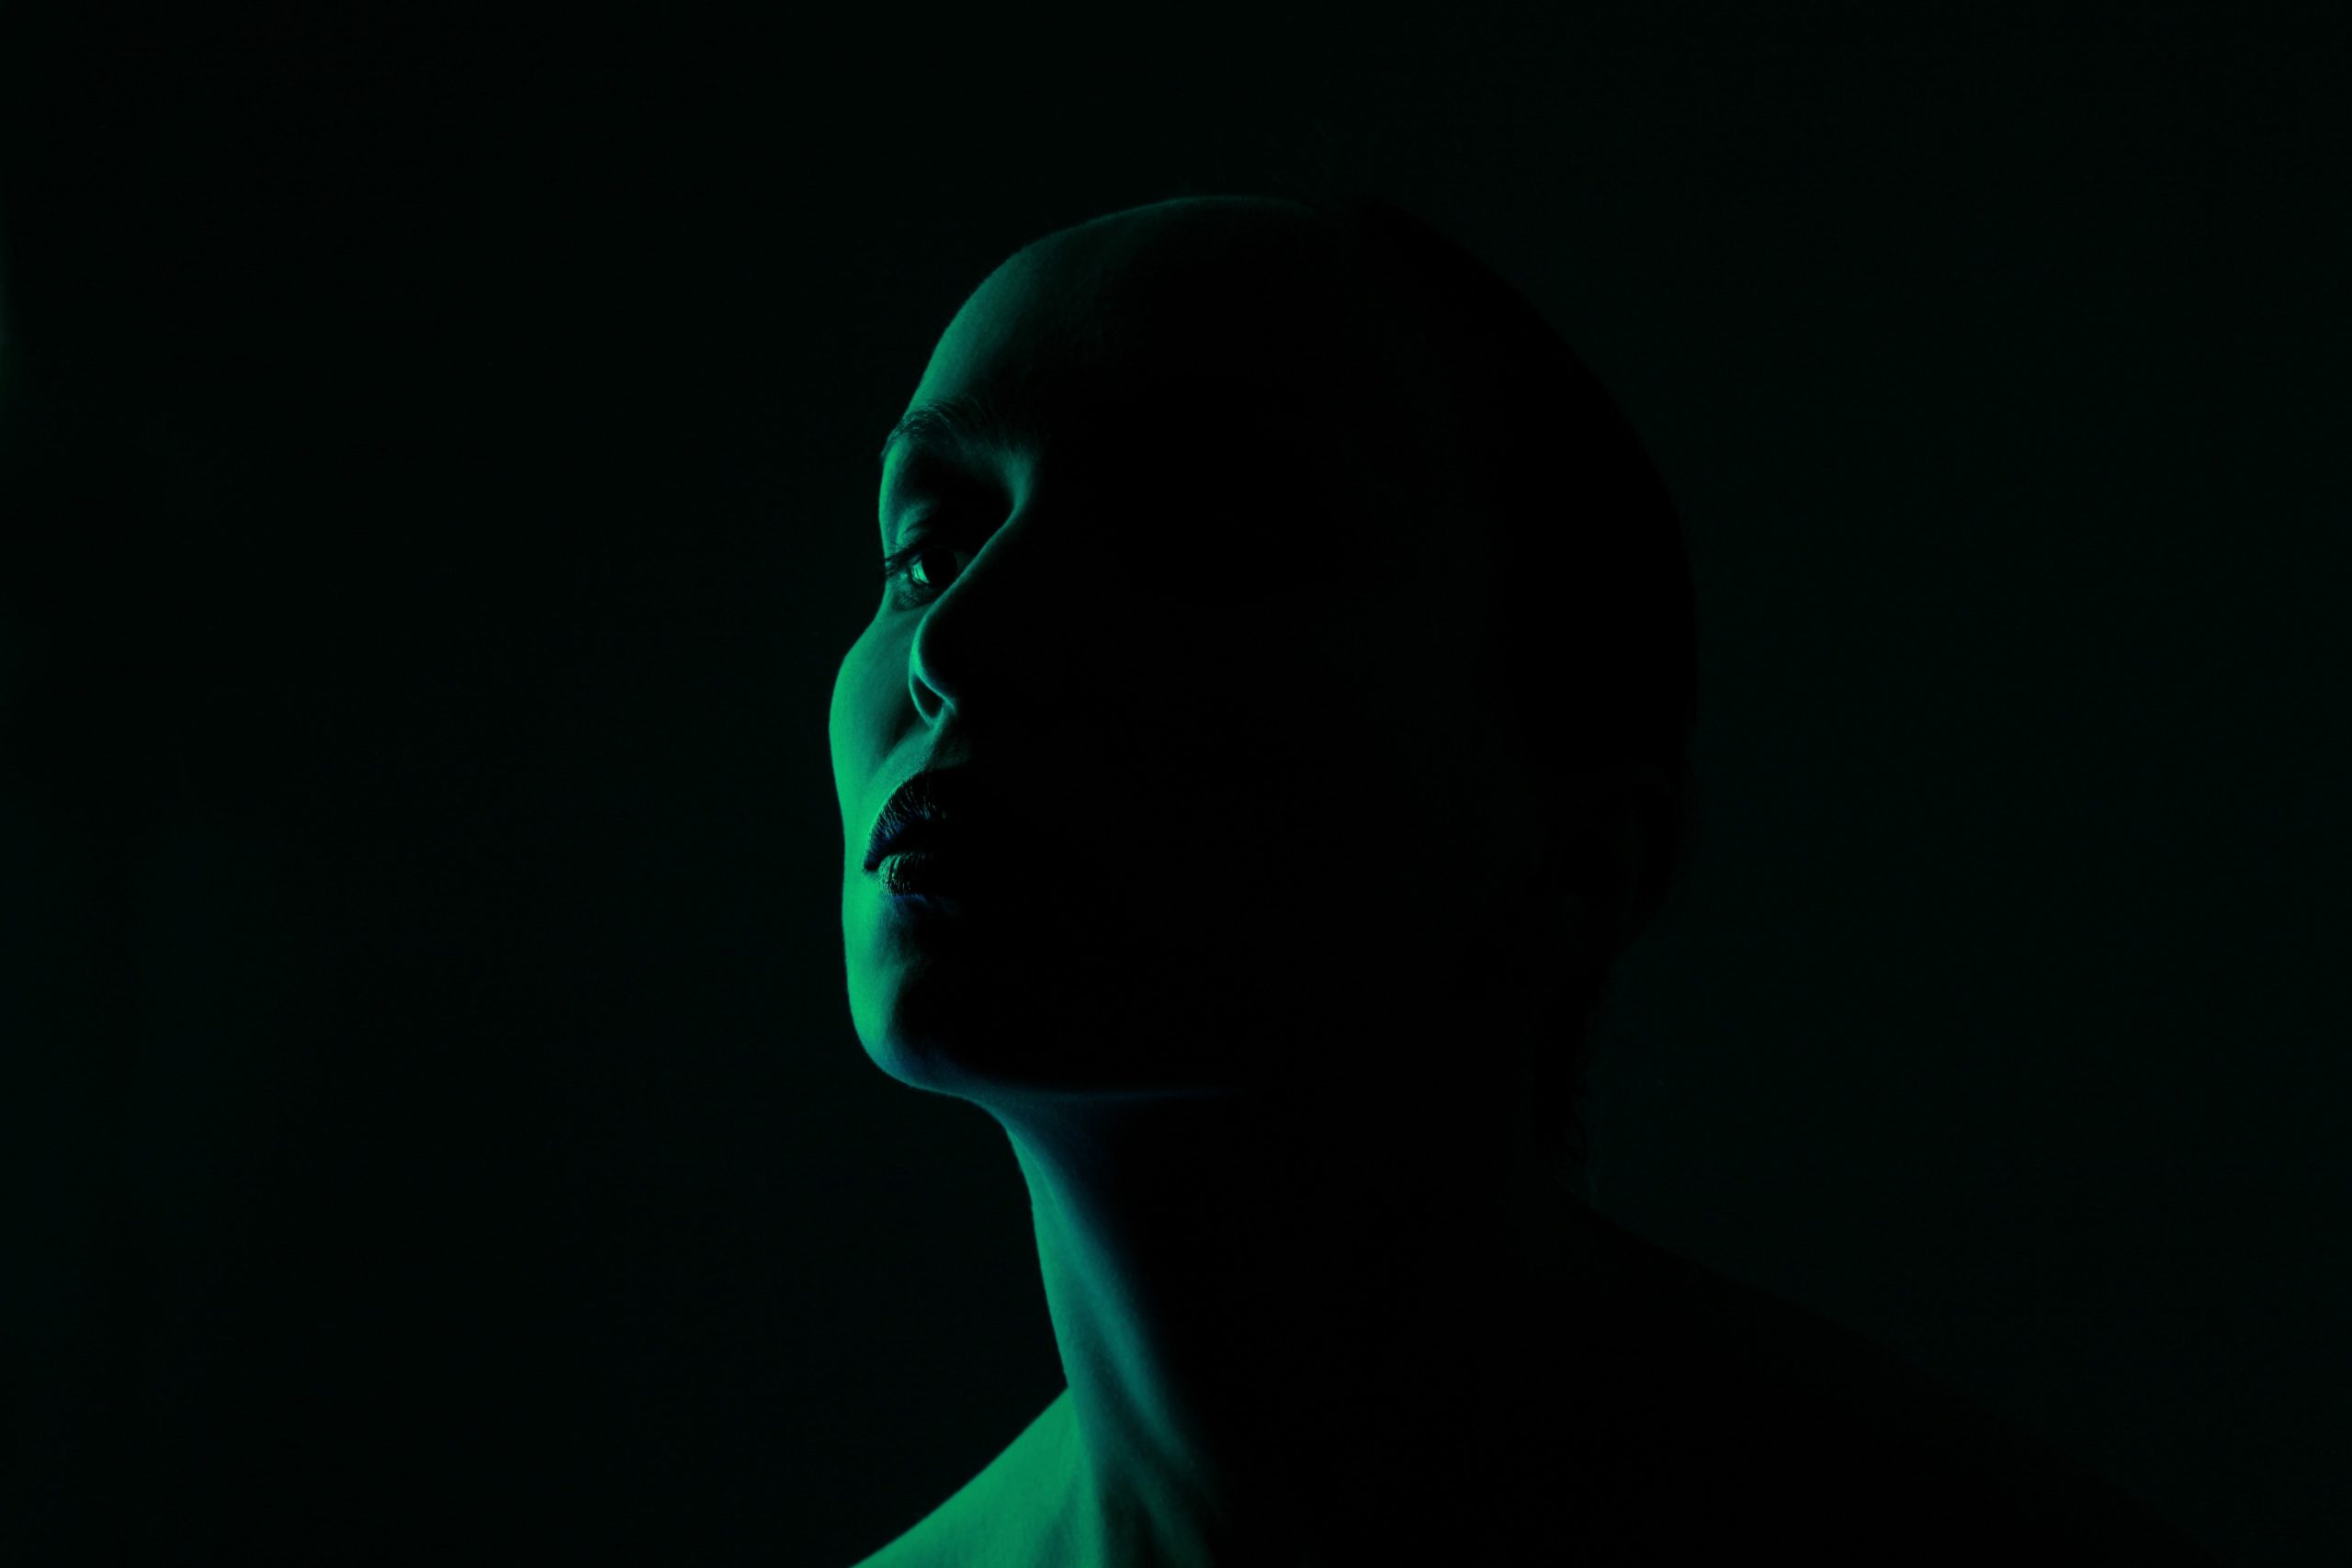
If the light is too dim, it’s best to bring in some additional illumination from outside sources. It might be an off-camera flash, LED panels, or some other kind of artificial lighting. If you want to capture beautiful shadows and prevent overexposing any areas of your shot, pay attention to the light’s direction and intensity.
Shot in dim lighting using an additional LED light source mounted on top of the camera
Prioritize stability: When shooting in dim light, equilibrium is key to avoiding camera wobble, which is particularly problematic when using slower shutter speeds. Using a monopod, tripod, or any other surface to steady the camera could be necessary. There are stabilization devices that come standard on some lenses and cameras. To further steady handheld shots, try holding your breath while shooting or bringing your elbows closer to your torso.
Apply a quick lens: A fast lens is one with a tiny f-number and a wide maximum aperture, such as f/1.2, f/1.8, or f/2.0. You won’t need to use slow shutter speeds or high ISO settings with these lenses since more light can reach the sensor in less time.
Fix an underexposed photo: No matter how meticulously you tweak the settings, certain low-light shots may still come out underexposed. To improve these underexposed photos, you can use post-processing tools like Photoshop or Adobe Lightroom to boost the exposure, tweak the highlights and shadows, and reduce noise.
Revolutionary Methods for Becoming an Expert in Low-Light Photography
In addition to the standard procedures, I also recommend the following advanced methods for working in dim light:
Test Autofocus in Dim Lighting
When photographing in low light without flash, the autofocus system of a camera has a harder time distinguishing the features and contours of the subject or scene due to the reduced light levels. The good news is that there are workarounds:
While your camera’s focus is locked, you might want to use a flashlight or some other kind of light to briefly highlight the subject. After you’ve locked focus, turn off the light and snap the shot.
A similar function called “AF assist beam” is available on several cameras. A different approach is to use the manual focus.
Zoom in on the subject using the Live View option on your camera, then manually adjust the focus until it appears sharp.
In low lighting, there is no light. In order to better illuminate your subject, you should search for any available light sources.
Photographing during the “golden hour,” the time immediately following dawn or before sunset, is the most famous example because of the lovely, warm light it can produce.
Finding innovative ways to work with the light that is already there is a common challenge in low-light photography. Finding, placing, and making good use of these sources is the key.
Lights from street lighting, for example, can produce striking shadows and bring up intriguing textures.
Neon signage can bring a splash of color to any setting, standing out against the blackness.
Furthermore, as a natural light source, the moon can cast a mystical light over landscapes, creating a really moody photograph. Capturing silhouettes against a moonlit sky can yield beautiful, breathtaking photographs.
You may have issues with noise or “grain” in your photographs when shooting in low light. Even though grain might lower a photo’s quality in some cases, it can also enhance it in others by adding texture and a creative, retro vibe.
Here we have an excellent illustration of how to transform a possible drawback into a resourceful benefit. Here are some helpful hints and examples:
You may add a raw, nostalgic, and evocative look to your photographs by using grain. Think about the classic, dramatic effect that grain may have in black and white photographs.
Photographers such as Daido Moriyama and Robert Frank, who shot portraits and classic street scenes, frequently used grain to amplify the emotional impact of their work.
Emphasize Textures
The textured quality of grain may bring certain textures in your photographs to life. For example, when shooting a close-up of a dilapidated structure, the grain might emphasize the rough, tactile nature of the flaking paint or bricks.
The use of grain in narrative can be quite effective. It can help achieve grittiness, authenticity, and realism. Take a documentary-style shot of a late-night diner scene as an example; grain can accentuate the foggy lighting and the raw, unfiltered nature of the subject matter.
Shots of Abstract Subjects
Images with grain can be more abstract, with an emphasis on form, light, and shadow rather than fine details. Shooting in low light with grain distorted and blurring the finer features is a wonderful way to make photographs that play with perception and ambiguity.
When working with low-light settings, particularly those that include a single light source (such as a streetlamp or candle), grain can be used to accentuate the mood. It can make the scene seem more intimate, mysterious, or gentle.
Luminous Paths & Photographs of Light Painting
In light painting, a portable light source is used in conjunction with a long-exposure photograph to either illuminate an area or subject or to direct the light into the camera itself in order to “create” an image or pattern. The use of city lights or the stars in a starry sky is a frequent technique for creating light trails in art.
Get your camera and tripod ready in a room with low light. Typically, you use a wider lens to capture a larger portion of the subject.
Change your camera’s setting to manual. To get clear shots with little blur, try shooting at a low ISO (100-200), narrow aperture (f/8 to f/16), and lengthy shutter speed (five to thirty seconds or more). To discover the optimal settings, you should do experiments.
Carry a flashlight, an LED bulb, or the screen of your smartphone to illuminate the area. To achieve a colored look, colored gels or transparent colored plastic sheets can be used to cover your light source.
Set up a timer or remote shutter release on your camera, and then use the light source to “paint” or “draw” on the screen. For a more abstract picture, you can wave the light around, write words, or make patterns.
You can light-paint the subjects in your frame for a more intricate effect. Using a flashlight to delicately light up a tree in a night landscape or a subject in a portrait is one example. The impact can be eerie and striking.
What are the drawbacks of shooting in low light?
There are many obstacles to overcome when shooting in low light, including:
Increased digital noise, which happens when ISO amplifies to compensate for poor light, causes grainy photos.
Low contrast in low-light settings hinders autofocus, leading to inaccurate focusing.
Longer shutter speeds let in more light, but they risk motion blur if the subject or camera moves.
Low light sensitivity reduces sensor information, leading to a loss of color and detail in the final image.
The depth of field is reduced when the aperture is wider to let more light in, which makes it harder to focus and restricts your creative freedom.
How can you avoid grain in dim lighting?
The first thing you should do if you want to avoid grain is to use a low ISO level. High ISO settings usually cause grain. A lens with a lower f-number, or one that has a greater maximum aperture, or one that uses a tripod and a slow shutter speed, can achieve this effect.
When a high ISO is required, noise reduction software like Capture One or Adobe Lightroom can be a lifesaver. Many of them use AI (artificial intelligence) to detect and eliminate noise in images without oversaturating them.
Which ISO Is Best for Dim Lighting?
How well your camera’s sensor handles low light and high ISO settings is the major factor to consider when deciding which setting to use.
Modern cameras are usually capable of shooting at ISO 6400, or even higher without noticeably increasing the noise level. Having said that, a lot of consumer-grade cameras could start to produce noticeable noise at ISO 1600 or even 800.
Use the lowest ISO setting possible for the best results when experimenting with different shutter speeds and apertures. Remember to experiment with your camera to determine the optimal setting for noise reduction.
Final Thoughts
To improve your photography, read other posts on the site. I hope you had fun shooting!